SIGN IN YOUR ACCOUNT TO HAVE ACCESS TO DIFFERENT FEATURES

FORGOT YOUR PASSWORD?

FORGOT YOUR DETAILS?

AAH, WAIT, I REMEMBER NOW!
(858) 842-4595
  • Policies
  • My Account
  • LOGIN

Norton Motorsports

  • Shop by Bike
    • Aprilia
      • Tuono 660 2021+
      • RS 660 2021+
      • Close
    • KTM
      • RC390 / Duke 390
      • Close
    • Kawasaki
      • Kawasaki Ninja 500 2024+
      • Ninja 250 / 300
      • Ninja 400 2018+
      • Ninja ZX-4RR 2023+
      • Z400 2019+
      • Close
    • Ohvale
      • GP-0
      • GP-2
      • Close
    • Yamaha
      • MT-03 2020+
      • MT-07 / FZ-07 2015-2017
      • MT-07 2018-2020
      • MT-07 2021+
      • R3 2015-2018
      • R3 2019+
      • R7 2021+
      • Close
    • Suzuki
      • Suzuki GSX-8R
      • Close

    • View All
    • Close
  • Norton Built Motorcycles
    • Norton Racing Hotbodies GP Spec Race Bodywork Kit - Kawasaki Ninja 400 Z400 Ninja400R main Norton Motorsports GP Spec Kawasaki Ninja400R
    • 2019-04-28 18_00_05-2018 Ninja 400 Race Motorcycle from Ninja400R.com Norton Motorsports Kawasaki Ninja400R
    • 2019 yamaha yzf-r3 race bodywork Hotbodies Racing Norton Motorsports Norton Motorsports Race Spec Yamaha R3
    • IMG 2548 Edit Norton Motorsports Kawasaki Ninja ZX4RR Race Motorcycle
    • Close
  • Apparel, Gear, & Tools
    • Apparel
    • Riding Gear
    • Tools
    • Close
  • MY CART
    No products in cart.
  • Bike Build Write-ups
    • Aprilia RS 660 2021-
    • Kawasaki Ninja 400 2018- / Z400 2019-
      • Important ** Kawasaki Ninja 400 / Z400 Critical Issues
      • Top5 *** Top 5 Kawasaki Ninja 400 / Z400 Mods and Upgrades
      • Do you need a fuel controller with full exhaust ninja 400 Do you need a Power Commander for full exhaust on the Kawasaki Ninja 400?
      • featured image How to install an R6 throttle tube in the Kawasaki Ninja 400 / Z400
      • 49899087_301487663905591_4918556926305894400_n How to remove the front fender and rear fender of the Kawasaki Ninja 400
      • 2019-02-07 10_57_46-Clipboard How to remove the gas tank on the Kawasaki Ninja 400
      • IMG_4330_2 How to remove the OEM bodywork of the Kawasaki Ninja 400
      • open clutch Kawasaki Ninja 400 / Z400 (Ninja 500 / Z500) Clutch Slipping, Poor Shifting, False Neutrals, and Dropping Gears – Explained and Fixed!
      • Kawasaki Ninja 400 dyno horsepower Kawasaki Ninja 400 Exhaust Dyno Shootout!
      • CVR_3132_Sep1519_CaliPhoto Ninja 400 Electronics and GP Bodywork Test
      • Traxxion Dynamics Omni Fork Spring Kit Yamaha R3 2015-2018 Suspension Spring Rate Chart for Kawasaki Ninja 400 / Z400
      • Braketech Vs Galfer Rotor Brake Test Rocco Landers What’s up with the Kawasaki Ninja 400 / Z400 brakes?
      • Close
    • Ohvale GP-0 / GP-2
      • Important ** Ohvale GP-0 / GP-2 Critical Issues
      • OV001 Ohvale 190 5 Speed Shift Star Cap Ohvale 190 False Neutral and Miss Shift Problems – FIXED!
      • Close
    • Yamaha R3 2015-2018
      • Important ** Yamaha R3 / MT-03 Critical IssuesJanuary 24, 2021
      • Top5 *** Top 5 Yamaha R3 / MT-03 Mods and UpgradesJanuary 24, 2021
      • Yamaha R3 Annitori Quickshifter QS Pro Annitori Quickshifter QS Pro installed and beta tested on Yamaha R3June 24, 2015
      • Yamaha R3 415 chain kit horsepower Dyno tested: 520 vs. 415 chain and sprockets – Yamaha R3February 14, 2016
      • IMG_3869 How to bleed the brakes or flush the brake fluid on the Yamaha R3 / MT-03September 7, 2015
      • IMG_3896 How to change the front brake pads on the Yamaha R3 / MT-03September 11, 2015
      • R3GPShift How to change the Yamaha R3 / MT-03 to GP ShiftSeptember 7, 2015
      • DSCN2608_zpsqza81eb3 How to do an oil and filter change on the Yamaha R3 / MT-03August 16, 2015
      • IMG_3857 How to get more dash clearance for your clipons and brake line – Yamaha R3August 28, 2015
      • IMG_3630 How to install a BMC Race Air Filter in the Yamaha R3 / MT-03August 8, 2015
      • IMG_3846 How to install a stainless steel braided front brake line on the Yamaha R3 / MT-03September 7, 2015
      • img_6102 How to install a Yoyodyne slipper clutch in the Yamaha R3 / MT-03December 10, 2016
      • topdown vortex clipons How to install aftermarket clipons on the Yamaha R3 / MT-03March 26, 2016
      • IMG_4189 How to Install Hotbodies Race Bodywork on the Yamaha R3May 7, 2016
      • IMG_3965 How to install the Traxxion Dynamics Fork Damper Rod kit with Cartridge Emulators in the Yamaha R3 2015-2018January 16, 2016
      • IMG_4511 featured How to remove the emissions systems and install a block off plate on the Yamaha R3 / MT-03August 16, 2015
      • DSCN2484_zpsuqljyccu How to remove the front wheel from the Yamaha R3 / MT-03August 2, 2015
      • How to remove the fuel tank from the yamaha R3 How to remove the gas tank from the Yamaha R3April 23, 2015
      • IMG_3927 How to remove the kickstand from the Yamaha R3May 7, 2016
      • DSCN2189_zpsg2hs8ooe How to remove the rear wheel from the Yamaha R3 / MT-03August 2, 2015
      • Remove Side Fairings Yamaha R3 How to remove the side fairings from the Yamaha R3May 23, 2015
      • IMG_0167 How to remove the tail and taillight of the Yamaha R3April 21, 2015
      • how to remove the windscreen yamaha r3 How to remove the windscreen and upper fairing from the Yamaha R3May 4, 2015
      • IMG_3985 How to replace the fork seals on the Yamaha R3January 16, 2016
      • IMG_3719 Installed: Hotbodies Color Form Race Bodywork – Yamaha R3 2015-2018August 26, 2015
      • Yamaha R3 Modified rear brake rotor, lightened machined rotor Lightweight Rear Brake Rotor for Yamaha R3October 1, 2015
      • IMG_4463 Paint is done, heading to 5zero4 Designs next weekend to install the graphicsDecember 14, 2015
      • Traxxion Dynamics Omni Fork Spring Kit Yamaha R3 2015-2018 Suspension Spring Rate Chart for Yamaha R3 / MT-03January 24, 2021
      • Yamaha R3 Woodcraft 1.5 rise clipons What are the best clipons for the Yamaha R3?March 24, 2016
      • yamahaR3_raceconcept_rearsets_gold_fitR1 What are the best rearsets for the Yamaha R3?March 26, 2016
      • Yamaha R3 Exhaust Test Superbike Dyno horsepower Norton Motorsports Yamaha R3 / MT03 Exhaust Dyno Test and Superbike BuildJune 6, 2019
      • 2015 yamaha r3 exhaust header muffler weight Yamaha R3 OEM exhaust weight, headers, muffler, slip-on, heat shieldJuly 3, 2015
      • Close
    • Close
  • Dyno Testing
    • Aprilia RS660 Dyno Testing
    • Kawasaki Ninja 400 / Z400
      • Kawasaki Ninja 400 dyno horsepower Kawasaki Ninja 400 Exhaust Dyno Shootout!September 2, 2019
      • Do you need a fuel controller with full exhaust ninja 400 Do you need a Power Commander for full exhaust on the Kawasaki Ninja 400?September 2, 2019
      • Close
    • Yamaha R3 / MT-03
      • Yamaha R3 415 chain kit horsepower Dyno tested: 520 vs. 415 chain and sprockets – Yamaha R3February 14, 2016
      • Yamaha R3 Exhaust Test Superbike Dyno horsepower Norton Motorsports Yamaha R3 / MT03 Exhaust Dyno Test and Superbike BuildJune 6, 2019
      • Close
    • Yamaha R7 / MT-07
    • Close
  • Other Cool Stuff
    • Power Commander vs Bazzaz vs ECU Flash vs aRacer Race ECU Power Commander vs. Bazzaz vs. ECU Flash vs. aRacer Race ECU
    • Woodcraft Toe Guard Yamaha R3 Woodcraft Shark Fin Toe Guard Modification Yamaha R3 / Kawasaki Ninja 400
    • Track_Day_TTD_2015_Thompson_8-24-15-2195-sm-300×200 5 Reasons Why Roadracers Give Up Street Riding
    • modified rear brake rotor rev a Reducing weight on a race bike and the different types of weight
    • video thumb Tire Shootout for Small Sport Bikes by Ari Henning
    • IMG_5091 Race Bike Designs, Graphics, and Paint Jobs
    • thumb Kawasaki Ninja 300 vs. KTM RC390 – Video Review
    • Close
  • Press Release
  • Race / Ride Reports
  • Race Team

How to remove the side fairings from the Yamaha R3

by Norton Racing / 2015, May 23 / Published in Yamaha R3 / MT-03
Remove Side Fairings Yamaha R3

This post will cover how to take off the side fairings and lower fairings from the Yamaha R3.  This may be helpful if you want to change the front turn signals for flush mount turn signals, change the exhaust or change the oil, or just repair crash damage.  If you’re doing an oil change, always remember to put some cardboard down so you don’t get oil everywhere 🙂

***Update 6/8/15***  When I posted this, I hadn’t yet tried to do an oil change, but a few people have mentioned that it isn’t necessary to remove the side fairings to get to the oil filter (some say the filter is SOO tight they have to remove the fairings the first time to get the filter off), so that’s good to know!

00 IMG_0280


Tools Needed:

4mm allen wrench
small pick or flat blade screwdriver
#2 phillips screwdriver
10mm socket


Step 1: Remove the side cover panels by removing the two screws from each side with a 4mm or 5/32″ allen wrench, then pulling the panels loose from the clips.

remove side cover panels remove side panel off


Step 2:  Use a 4mm of 5/32″ allen wrench to remove the 3 screws holding on the black lower side panel.  Then release the plastic tab in the front lower corner of the panel.  Then remove the panel by sliding it down and to the front.  Do not pull it out until it is loose, there is a large tab in the middle near the top that must slide down to release.

03 IMG_0208 04 IMG_0210 05 IMG_0209

06 IMG_0212 07 IMG_0211


Step 3: Remove the inner black plastic covers from the top side of the side fairings. First remove the two screws visible from the top of the bike with a 4mm or 5/32″ allen wrench. Then remove the two plastic clips on the inside of the bike and one plastic clip from beneath the side cover panel that you’ve already removed. Use a phillips screwdriver to release the clips, then pry them out with your fingers or a small pick or flathead screwdriver. Finally, pull the panel to the rear of the bike to release the remaining tabs and remove the panel.

04 IMG_0213 05 IMG_0215 06 IMG_0216 07 IMG_0217


Step 4:  Release the three lower inside black cover panels, do not try to remove them from the bike until later.  First remove the 2 screws from the lower middle panel, be careful, these screws are VERY tight, use caution and support the panel with your free hand so you don’t break anything or strip the screw.  Second, remove the screw and the plastic clip from the lower inside left and right panels.  Finally, remove the plastic clip from underneath the bike to disconnect the left and right side fairings from each other.  Allow the three black panels to remain in the bike until after the next step.

12 IMG_0218 13 IMG_0219 14 IMG_0224


Step 5:  Release the lower half of the side fairings by first removing the attachment near the seat (it’s a bolt on the right side and a nut on the left side), then removing the bolts from the top near the gas tank.

16 IMG_0221

IMG_0223


Step 6:  You should now be able to pull the lower half of the fairings away from the bike and remove the lower middle inside black trim panel.  Leave the lower left and right inside black trim panels hanging in the bike until you remove the side fairings, they have some wiring clipped to them that will hold them in place.

18 IMG_0225

20 IMG_0227

19 IMG_0226


Step 7:  Remove the side fairings by removing the last screw from the top that attaches them to the upper fairing, unclipping them from the upper fairing (see picture below), the sliding the entire fairing slightly toward the front of the bike.  Once the fairing is loose, you can unclip the turn signal.  Once the side fairings are removed, the turn signals can be accessed or removed by prying out the metal cover from the rubber piece, and pulling out the entire turn signal, you don’t have to remove the 8mm nut.

15 IMG_0220

21 IMG_0228 22 IMG_0229

22 IMG_0235

23 IMG_0230 23 IMG_0234 24 IMG_0231 25 IMG_0232


Step 8:  Now you can unclip the lower inside left and right black panels from the wires and remove them from the bike if you need to.

25 IMG_0233


That’s all!  Behold the Yamaha R3 in all it’s naked beauty!

00 IMG_0280

IMG_0237 IMG_0238 IMG_0239 IMG_0240 IMG_0241 IMG_0242 IMG_0243 IMG_0244 IMG_0245 IMG_0246 IMG_0248 IMG_0249 IMG_0250 IMG_0251 IMG_0252 IMG_0253 IMG_0254

Thanks for reading!  Please leave comments or questions below!

  • Tweet

About Norton Racing

What you can read next

How to remove the tail and taillight of the Yamaha R3
How to remove the fuel tank from the yamaha R3
How to remove the gas tank from the Yamaha R3
how to remove the windscreen yamaha r3
How to remove the windscreen and upper fairing from the Yamaha R3

23 Comments to “ How to remove the side fairings from the Yamaha R3”

  1. travis giguere says : Log in to Reply
    May 24, 2015 at 2:31 AM

    EXCELLENT WRITE-UP, BRO

  2. abvc says : Log in to Reply
    July 3, 2015 at 2:21 AM

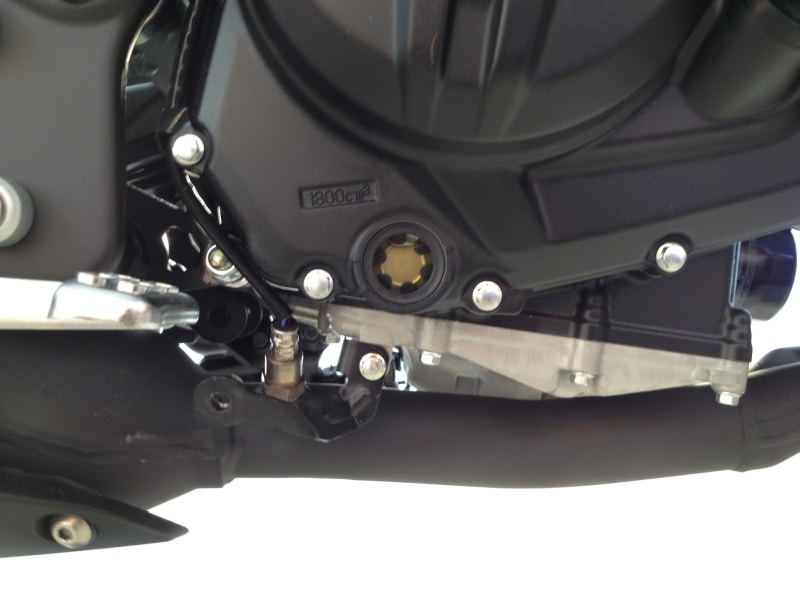
    hey, how do you release the connector & clip of the cable using flat screwdriver??

    1. jbluetooth@gmail.com says : Log in to Reply
      July 3, 2015 at 6:45 PM

      Here’s a photo to give a better idea:
      Removing clip with a flat blade screwdriver

  3. Claw says : Log in to Reply
    August 11, 2015 at 4:30 PM

    wow what a great post. Thanks a lot!

  4. Paul says : Log in to Reply
    August 31, 2015 at 6:48 PM

    What is involved with making the bike fully functional without the fairing? I would love to build a “naked bike” out of a new R3, but have limited experience with contemporary Japanese bikes. Thank You Paul

    1. jbluetooth@gmail.com says : Log in to Reply
      September 7, 2015 at 7:09 AM

      You shouldn’t have any problems removing the fairings. You’d just have to figure out how to mount the basic things like turn signals and lights. In fact, it appears that Yamaha will be releasing the FZ-03 naked version possibly before the end of the year in the US.

  5. Mark Foster says : Log in to Reply
    December 12, 2015 at 9:27 AM

    Excellent DIY and thanks for the high quality. I just replied on a post where you referred to a video of this. Is there one? I did not see it listed on the other aftermarket company website you referred to.

    1. jbluetooth@gmail.com says : Log in to Reply
      December 25, 2015 at 8:34 AM

      I don’t see your reply, what video are you looking for? If I have a broken link I’ll fix it right away, thanks!

      1. Mark Foster says : Log in to Reply
        December 25, 2015 at 9:12 AM

        http://www.r3-forums.com/forum/showthread.php?t=50658

        1. jbluetooth@gmail.com says : Log in to Reply
          December 25, 2015 at 9:26 AM

          They haven’t posted it yet unfortunately… I’ll bug them about it.

  6. Lalachill says : Log in to Reply
    March 12, 2016 at 4:33 AM

    Tried your tutorial and it made it all easy. Thanks for this.

  7. Egor says : Log in to Reply
    June 11, 2016 at 8:50 PM

    Thanks for the great write-up! Helped me change the turn signals to flush ones. This was nice and easy to follow.

  8. Beginners says : Log in to Reply
    July 3, 2016 at 9:12 AM

    Dear Sir,

    Detailed progress shots really touched! Thanks for information.

    Anyhow, If you don’t mind Could I simple asking for that.

    Still I’ve no chance to disassemble the whole fairing on my R3.

    but, the repair shop has once last time.

    After then, I’ve suffering from the “Buzzing” Noise when the RPM running thru and staying 5000~5300rpm.

    it likes kinda sharp and some metal with plastic sticks toghther…but I’ve no idea…

    By any chance, If you think something has possible to lead it, Plz Let me know…

    Sorry for asking 🙂

    1. jbluetooth@gmail.com says : Log in to Reply
      July 3, 2016 at 9:39 AM

      Sometimes things can be loose after the fairings are taken apart. Look for wire looms that are not clipped in anymore, or zip ties vibrating against the fairing. Listen close when the bike is on stands to find the vibration.
      Good luck

  9. TLY Rider says : Log in to Reply
    March 5, 2017 at 1:42 PM

    Is there a detailed tutorial similar to this on how to put all the fairing back.

  10. Shenster says : Log in to Reply
    May 13, 2017 at 12:50 AM

    Hello, since the Mt-03 is based on the R3, do you think its possible to bolt on a set of R3 Fairings onto the MT-03?

    Thanks!

    1. jbluetooth@gmail.com says : Log in to Reply
      May 13, 2017 at 8:13 PM

      In theory they would fit, but I don’t know if all the mounting tabs and brackets and stuff will be there…

      1. Shenster says : Log in to Reply
        May 13, 2017 at 11:19 PM

        ah.. thanks for the reply anyways! love the site!

  11. Iszam says : Log in to Reply
    June 20, 2017 at 11:21 PM

    Hi, i would like to ask, can the side cover tail for R3 fix to MT03 abs 2015? Reason is i’m riding MT03 but i’m intending to remove the pillion handrest, thus living 2 big hole behind. R3 tail side cover is 1piece without holes for the handrest, making the bike look clean and smart.

    1. jbluetooth@gmail.com says : Log in to Reply
      June 25, 2017 at 5:14 PM

      I’m not sure. Both bikes are built on the same platform, but I’m not sure all the mounting brackets will be there.

  12. Simon says : Log in to Reply
    July 17, 2017 at 3:05 PM

    Great writeup, thanks! When I go through this guide more carefully I’ll be able to find out where the one leftover screw goes…
    Out of curiosity, what is the cylindrical thing in IMG0240? Is it a fuel filter? I ask because my R3 (purchased new in New Zealand) doesn’t have this. I used the (unused) mount for this thing to attach an airhorn to the frame.

    1. jbluetooth@gmail.com says : Log in to Reply
      August 10, 2017 at 4:00 PM

      the charcoal canister probably? some countries don’t have this smog equipment.

You must be logged in to post a comment.

Search All Posts

Post Category:

Yamaha R3 / MT-03
  • ** Yamaha R3 / MT-03 Critical Issues
  • *** Top 5 Yamaha R3 / MT-03 Mods and Upgrades
  • Annitori Quickshifter QS Pro installed and beta tested on Yamaha R3
  • Dyno tested: 520 vs. 415 chain and sprockets – Yamaha R3
  • How to bleed the brakes or flush the brake fluid on the Yamaha R3 / MT-03
  • How to change the front brake pads on the Yamaha R3 / MT-03
  • How to change the Yamaha R3 / MT-03 to GP Shift
  • How to do an oil and filter change on the Yamaha R3 / MT-03
  • How to get more dash clearance for your clipons and brake line – Yamaha R3
  • How to install a BMC Race Air Filter in the Yamaha R3 / MT-03
  • How to install a stainless steel braided front brake line on the Yamaha R3 / MT-03
  • How to install a Yoyodyne slipper clutch in the Yamaha R3 / MT-03
  • How to install aftermarket clipons on the Yamaha R3 / MT-03
  • How to Install Hotbodies Race Bodywork on the Yamaha R3
  • How to install the Traxxion Dynamics Fork Damper Rod kit with Cartridge Emulators in the Yamaha R3 2015-2018
  • How to remove the emissions systems and install a block off plate on the Yamaha R3 / MT-03
  • How to remove the front wheel from the Yamaha R3 / MT-03
  • How to remove the gas tank from the Yamaha R3
  • How to remove the kickstand from the Yamaha R3
  • How to remove the rear wheel from the Yamaha R3 / MT-03
  • How to remove the side fairings from the Yamaha R3
  • How to remove the tail and taillight of the Yamaha R3
  • How to remove the windscreen and upper fairing from the Yamaha R3
  • How to replace the fork seals on the Yamaha R3
  • Installed: Hotbodies Color Form Race Bodywork – Yamaha R3 2015-2018
  • Lightweight Rear Brake Rotor for Yamaha R3
  • Paint is done, heading to 5zero4 Designs next weekend to install the graphics
  • Suspension Spring Rate Chart for Yamaha R3 / MT-03
  • What are the best clipons for the Yamaha R3?
  • What are the best rearsets for the Yamaha R3?
  • Yamaha R3 / MT03 Exhaust Dyno Test and Superbike Build
  • Yamaha R3 OEM exhaust weight, headers, muffler, slip-on, heat shield

Contact Information

Email: sales@norton-motorsports.com
Telephone: (858) 842-4595

Address

Norton Motorsports
San Diego, CA

Contact us for address before sending anything.

Thank you.

© Copyright Norton Motorsports. All rights reserved.

TOP