How to install the Traxxion Dynamics Fork Damper Rod kit with Cartridge Emulators in the Yamaha R3 2015-2018

This post will show you how to remove the front forks from the Yamaha R3 and dissassemble them to install the Traxxion Dynamics Fork Damper Rod kit with Cartridge Emulators. This is also how to replace the fork seals on the Yamaha R3, just reassemble the fork with the stock parts instead of the new Traxxion Dynamics parts.
If you are curious what is a damping rod fork and how does a cartridge emulator work, here is an awesome writeup from Race Tech that covers this in great depth with awesome pictures and diagrams. Take the time and read this, it’s very informative. This comes from their awesome book “Race Tech’s Motorcycle Suspension Bible”, which you can buy from Amazon here:
Tools you will need for this installation are:
large adjustable wrench or 22 mm socket
dead blow hammer or rubber mallet
5mm allen wrench
6mm allen wrench
8mm socket
10mm socket
14mm deep socket
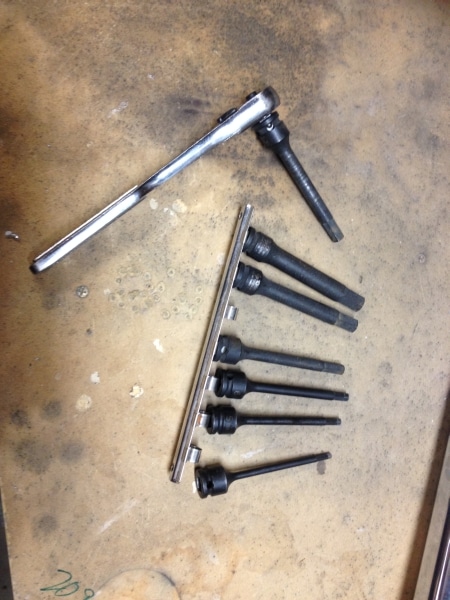
8mm extended allen socket (I have a set of these from Grey Pneumatic that I use CONSTANTLY when I am working on a bike, any time I need an allen wrench. These are impact driver sets so they are extremely hard and durable tools, I highly recommend getting this set, you will love having it):
metric set: and here’s the standard set:
*possibly an impact driver, cordless or pneumatic will work fine, I needed one
aluminum or plastic v-groove vise jaws or vise jaws cut to 41mm to clamp the fork legs. You can also use the OEM clipons (if you have replaced them) to clamp the fork leg and then just clamp the clipon in the vise. SV650 clipons are also 41mm. I have a set of these magnetic aluminum and plastic jaws that I use for stuff like this, got them for like $15 from amazon:
heavy fork seal grease, here’s a couple good ones from Race Tech and KYB:
oil height gauge, if you don’t have an oil height gauge, this simple one from Motion Pro or Pit Posse is pretty much the standard and is very inexpensive:
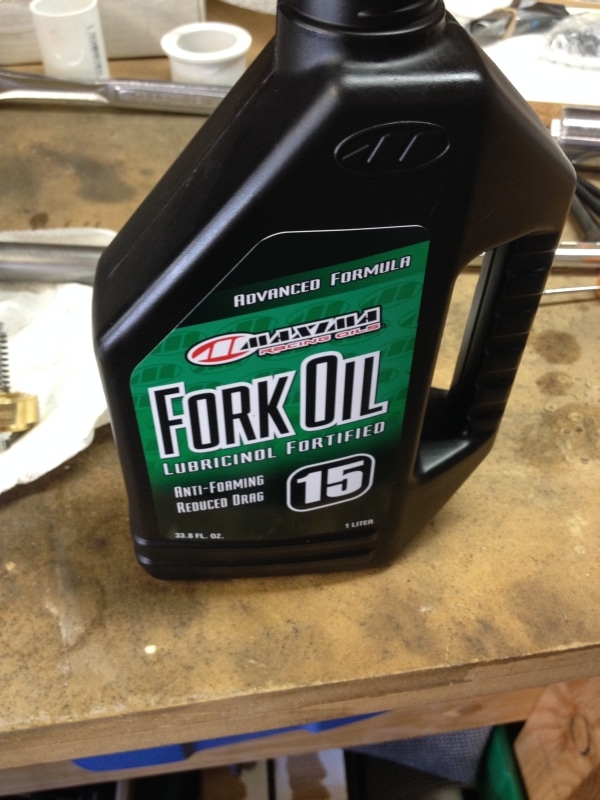
Fork Oil, Maxima 15wt is recommended and works very well for most setups. One liter is just enough if you don’t spill, but I spilled a little, so I needed (2) one liter bottles of oil
Since you’ll have the forks completely apart, it’s a good idea to replace the fork seals unless your bike is brand new, and it’s a good idea to have a set of extra fork seals handy when you start, just in case you damage one taking it apart or something:
You’ll need a fork seal driver, there are instructions below for making your own from PVC pipe from Home Depot
You’ll also need a plastic tub or bucket to catch oil
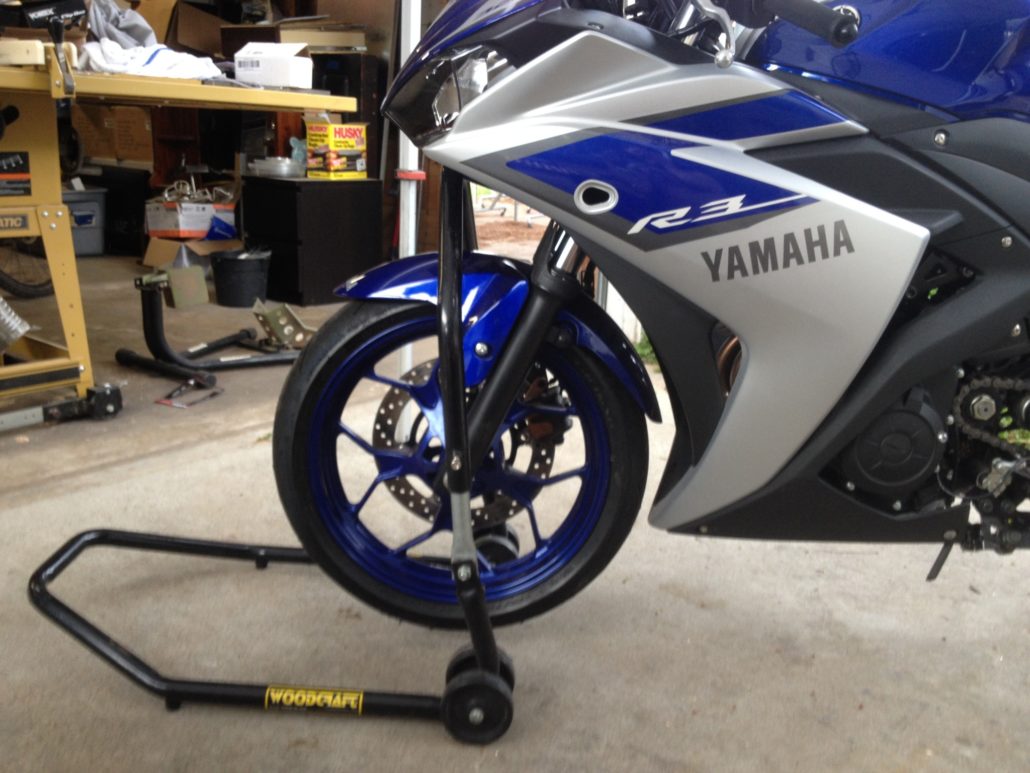
Step 1: Put your bike on a rear stand, then raise the front using a triple tree stand. You have to use a triple tree stand and not a fork stand because you have to remove the forks. Never use a front stand by itself! Always support the rear with a rear stand first, then lift the front with a front stand.
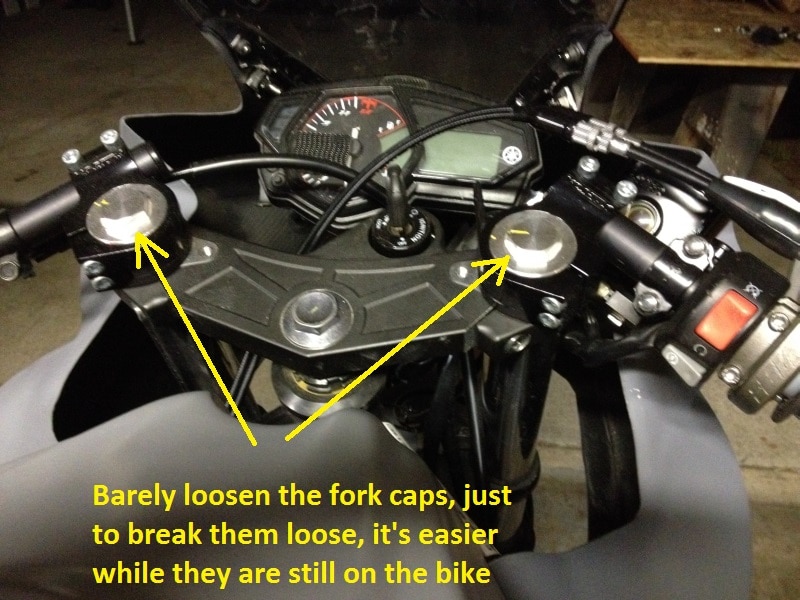
Step 2: Loosen the upper triple clamp and your clipons (if you have OEM clipons or Vortex clipons, they will be on top of the triple clamp, if you have Woodcraft clipons, they will likely be below the triple clamp), then use the large adjustable wrench or 22 mm socket to break loose the fork cap. Only break it loose a fraction of a turn!!! It shouldn’t be very tight, but it’s still easier to break loose while the forks are still on the bike. Do not loosen it all the way!!!
Step 3: Follow my instructions here to remove the front wheel. Once you remove the brake caliper, wrap it with a rag and zip tie it to the lower triple clamp so it is out of your way and not dangling.
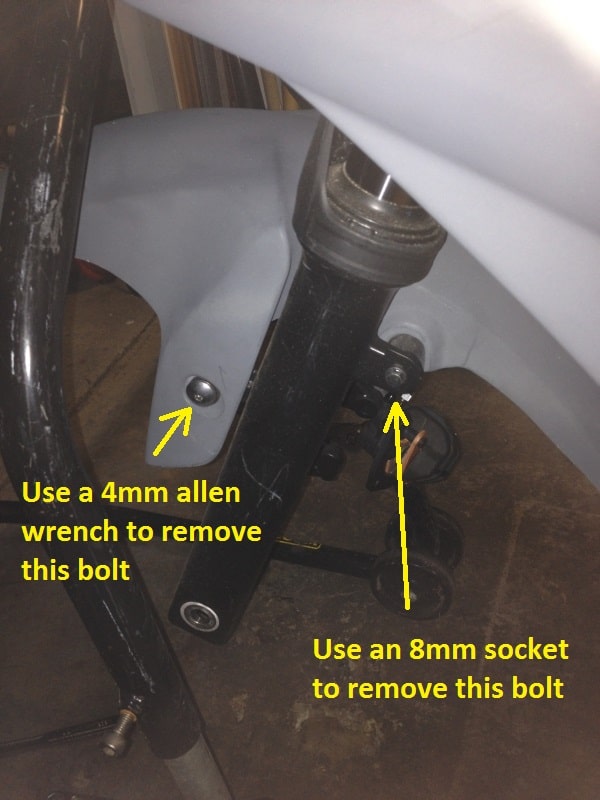
Step 4: Remove the front fender by removing the 2 rear bolts with an 8mm socket and the 2 front bolts with a 4mm allen wrench, then gently squeezing the sides together to slide it out between the forks:
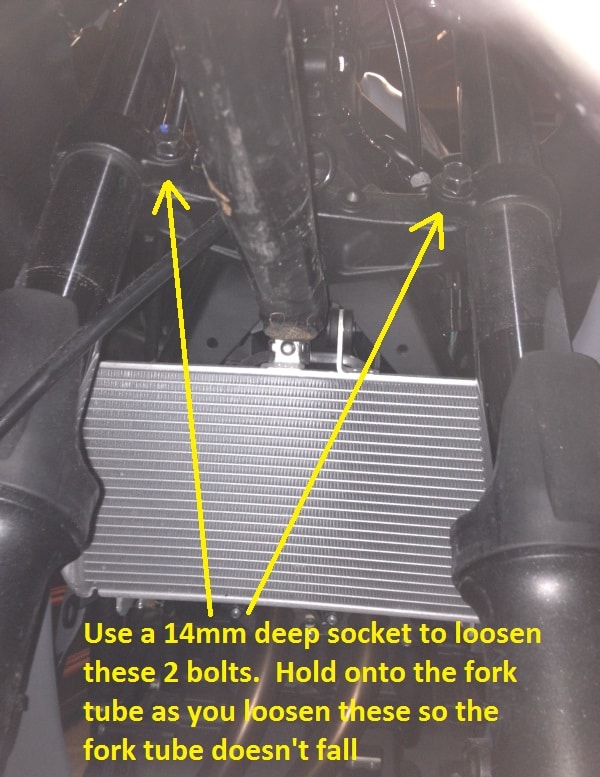
Step 5: Once the wheel and fender are removed and the brake caliper is secured out of your way, use a 14mm deep socket to break loose the lower triple clamp bolt on one fork tube. This bolt can be very tight so you may want to have someone hold the bike secure while you break this bolt loose. Be careful not to knock the bike off the stands. After you break it loose, hold on to the fork tube while you loosen the bolt until the fork slides free. Slide the fork out of the bottom of the triple clamps and lay it on the bench. Remove the other fork leg the same way.
Step 6: Grip the forks in a vise about 4 inches from the top in plastic or aluminum vise jaws so you don’t damage the fork tube. It will help keep the fork leg from spinning in the vise if you clean the fork leg with a solvent such as acetone to remove any oil residue first. Be careful you don’t crush the fork leg, so only clamp it as tight as you need to so that it doesn’t spin. Wrapping a piece of old bicycle tire or other rubber around it can help if you are having trouble with it spinning.
You can also use an old 41mm clipon to hold the fork and clamp the clipon bar in a vise (such as the ones from your R3 or SV650 if you have installed aftermarket clipons). Use a 22 mm socket or adjustable wrench to remove the fork cap. Use downward pressure as you unscrew the fork cap as it is under a little pressure from the fork spring.
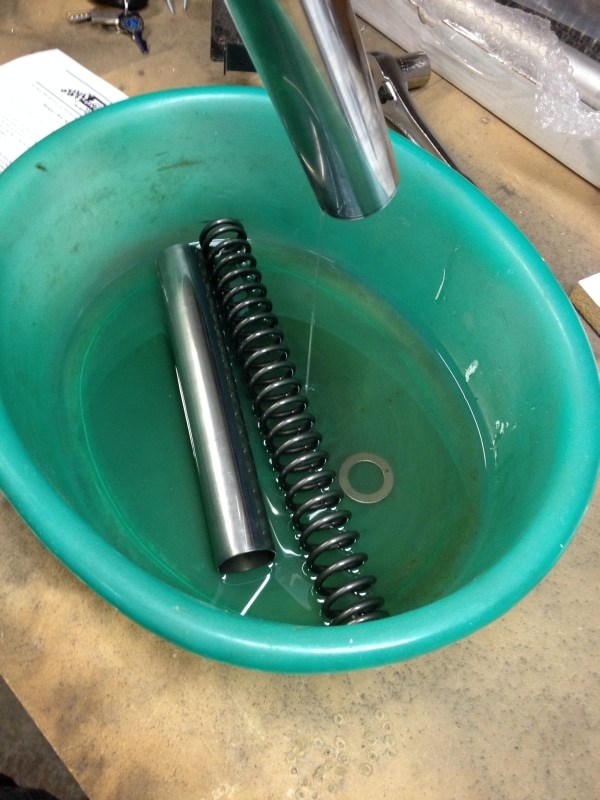
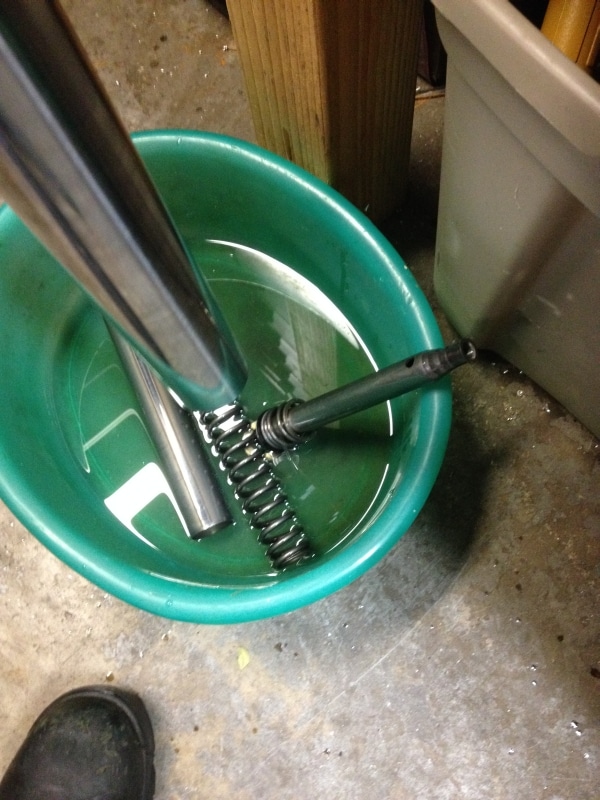
Step 7: Dump out the fork oil, stock spacers, washer, and springs into a plastic tub. You can clamp the fork upside down in the vise above the plastic tub and let it drain for a few minutes to get most of the oil out.
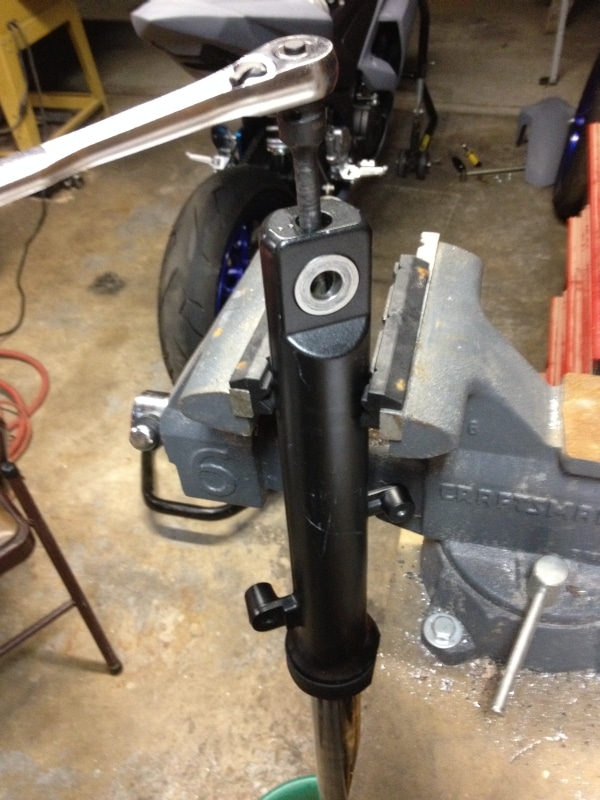
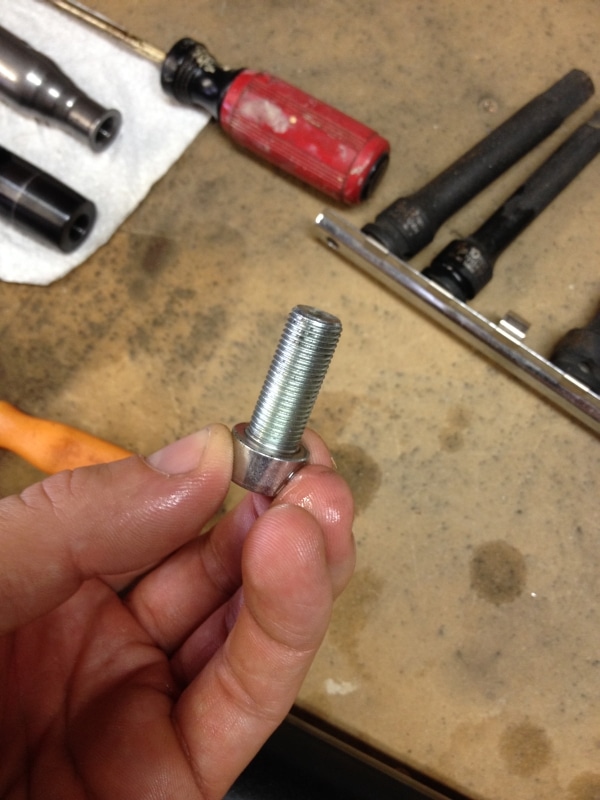
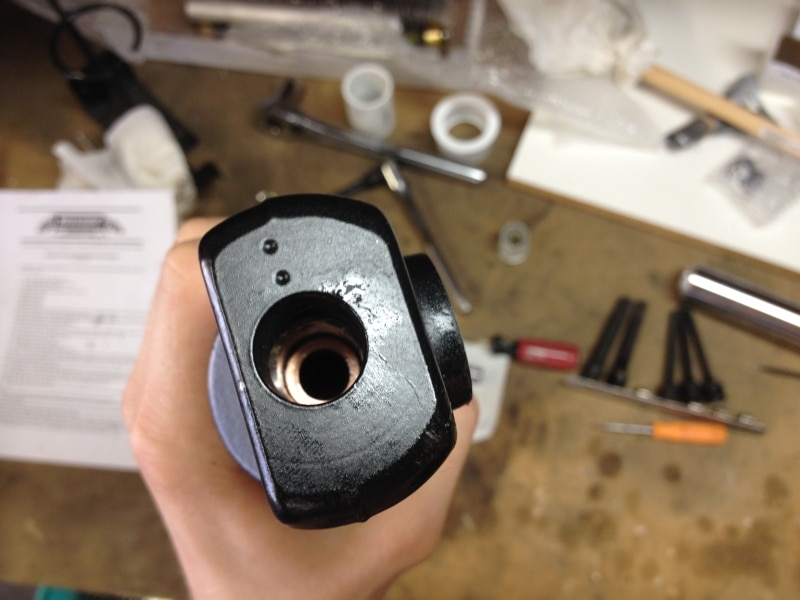
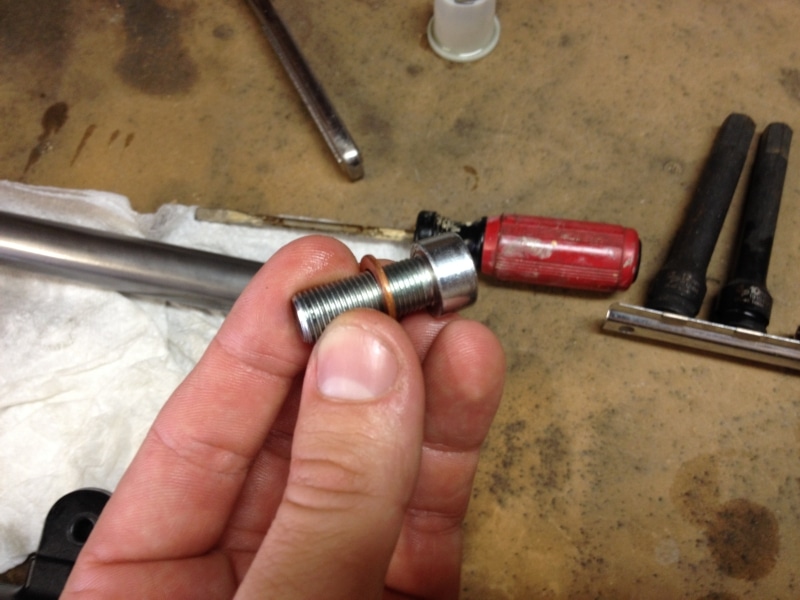
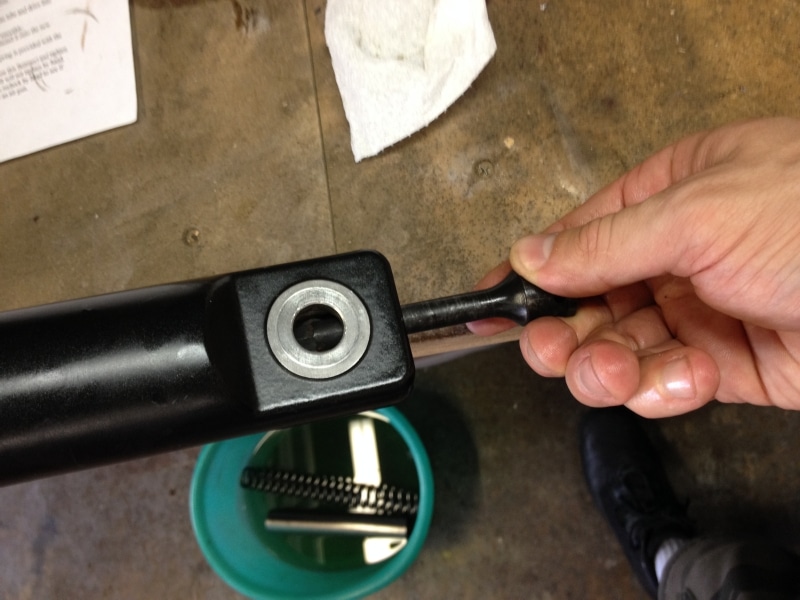
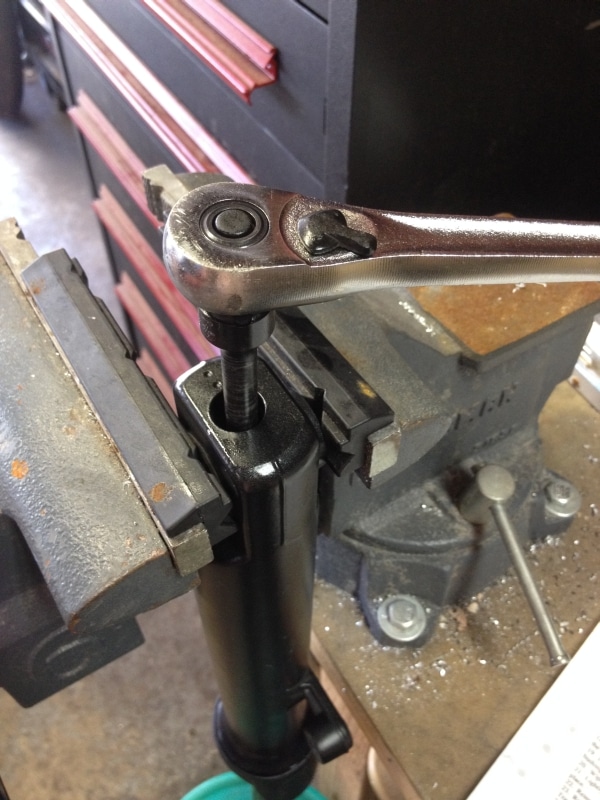
Step 8: Clamp the fork leg in the vise by the flat end where the wheel mounts or across a caliper mount so it doesn’t spin in the vise and use an extended 8mm allen head socket to remove the bottom bolt. Use the proper tool and be careful not to to strip the bolt. The damper rod and top out spring will now fall out. Take care of the bolt and crush washer that come out, you will have to reuse them. The crush washer may stick to the bottom of the fork tube, remove it and keep it with the bolt. Clean the locktite off the bolt, washer, and bottom of the fork tube.
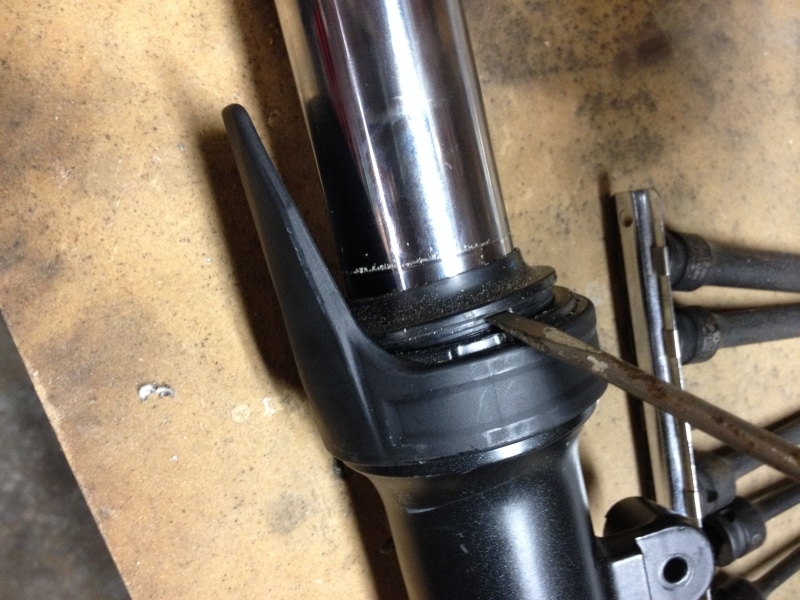
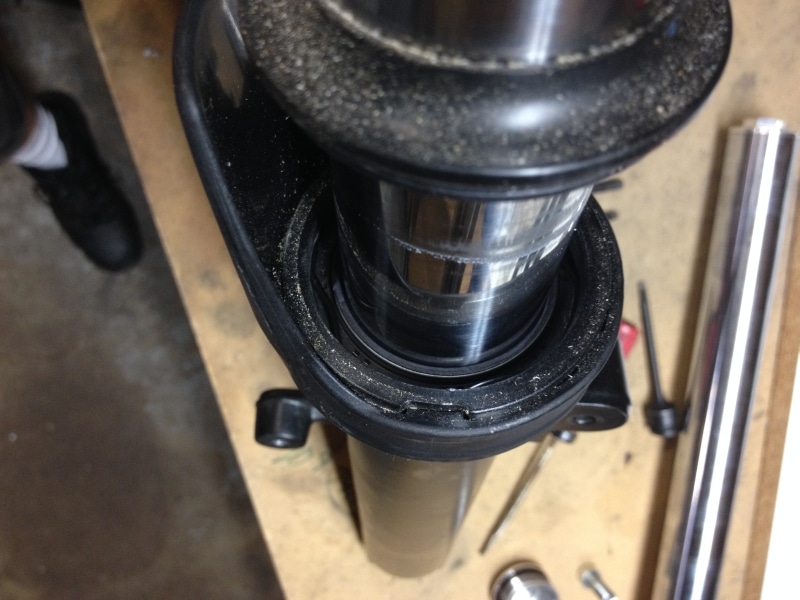
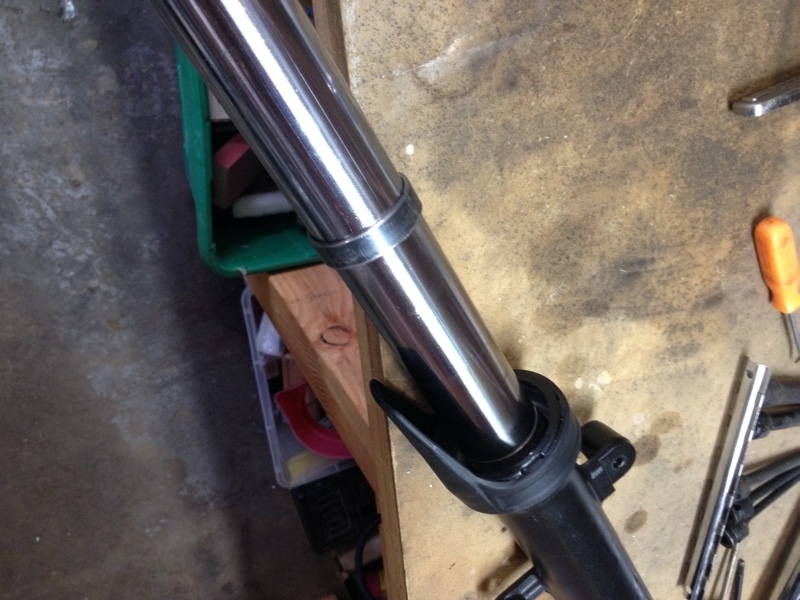
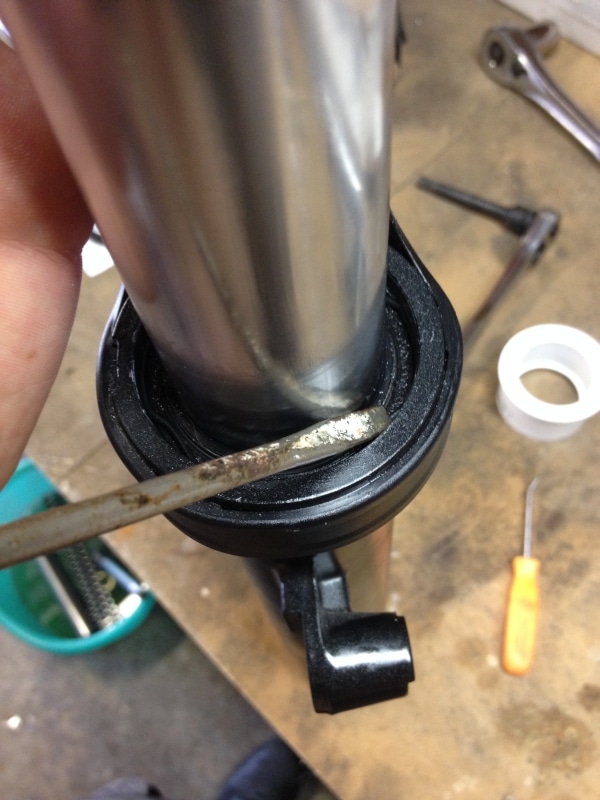
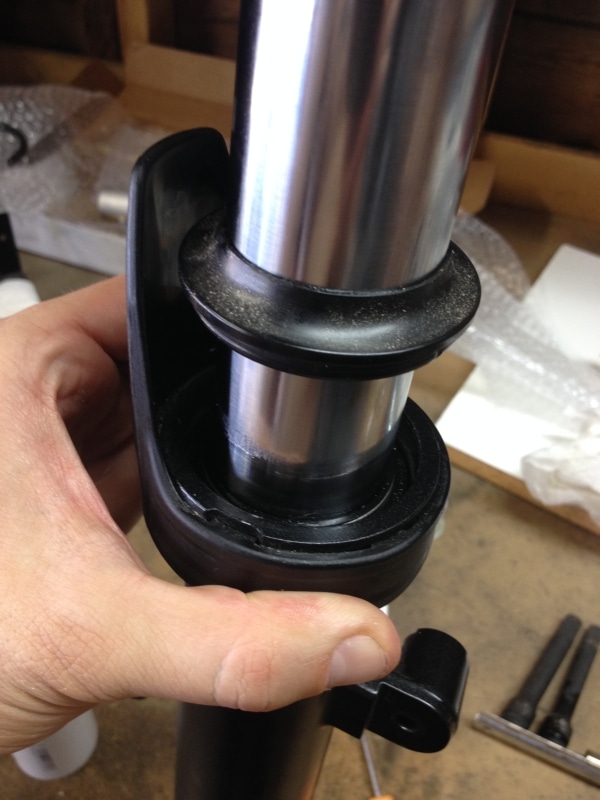
Step 9: Gently pry up the dust seal with a small flat blade screwdriver to expose the retainer clip underneath. Pry one side, then the other side, working your way around so you don’t damage the seal.
Step 10: Use a small pick to pry out the retainer clip.
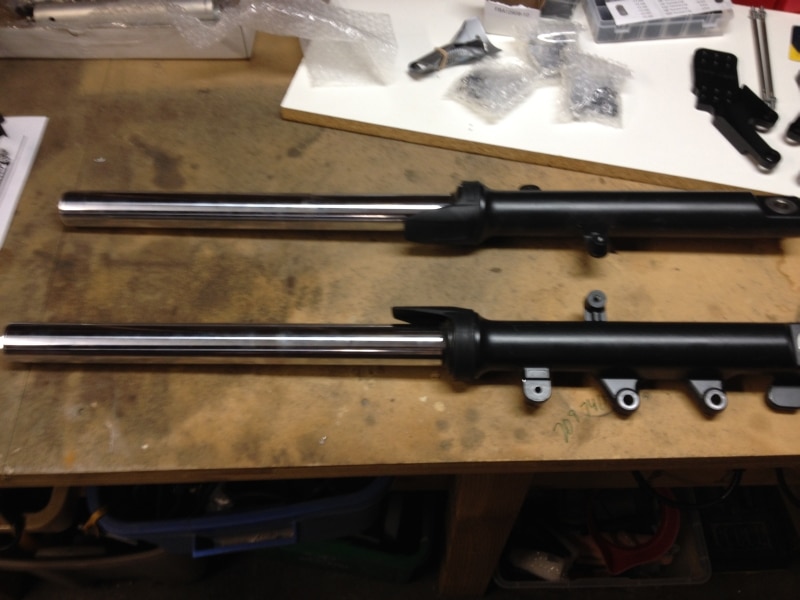
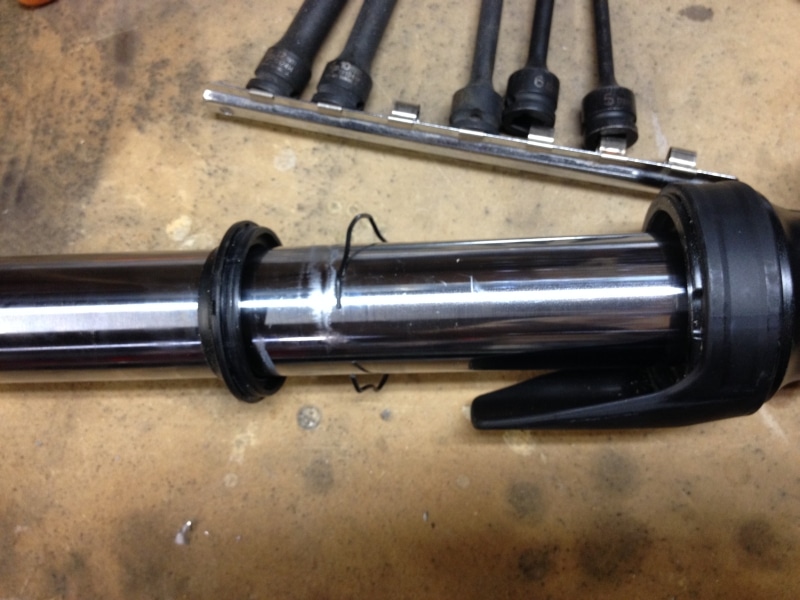
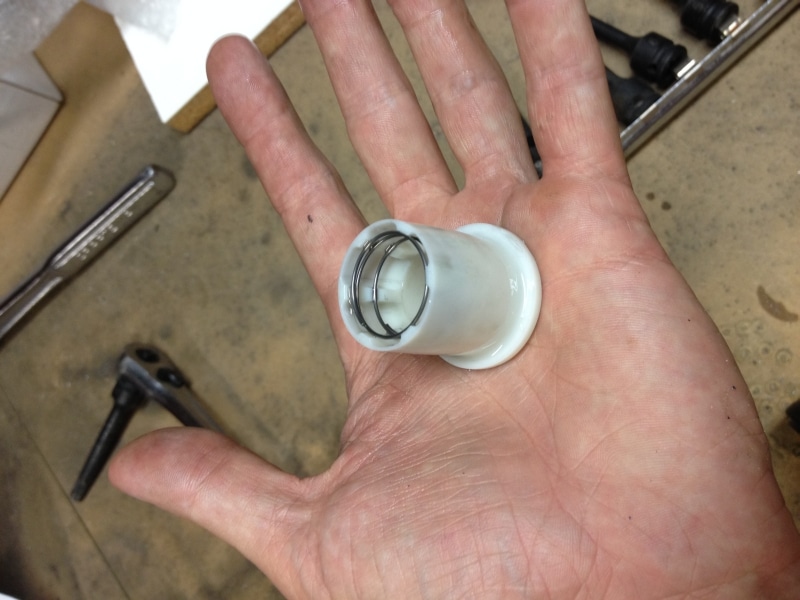
Step 11: Once the retainer clip is free, the fork seal is the only thing holding the upper fork leg together with the lower fork leg. Slide the upper fork leg into the lower, then quickly slide it out until it bangs against the fork seal. Use the fork leg like a slide hammer to pound out the fork oil seal and separate the upper and lower fork legs. Clean all parts with contact cleaner or solvent including the inside of the lower fork leg where the oil seal sits. Remove the white plastic hydraulic bottom out cone from the bottom of the fork leg, you will not be using it. While you have the fork tubes separated, it’s a good idea to check and be sure they aren’t bent before you reassemble everything.
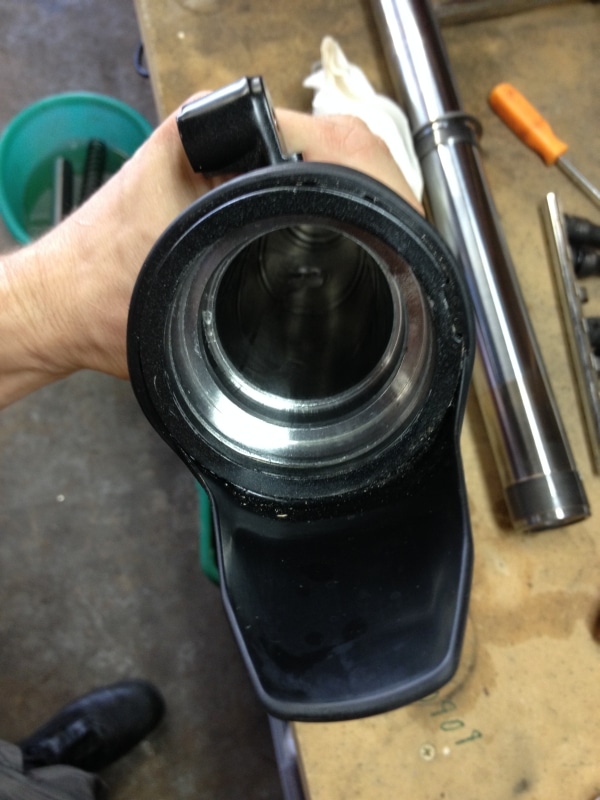
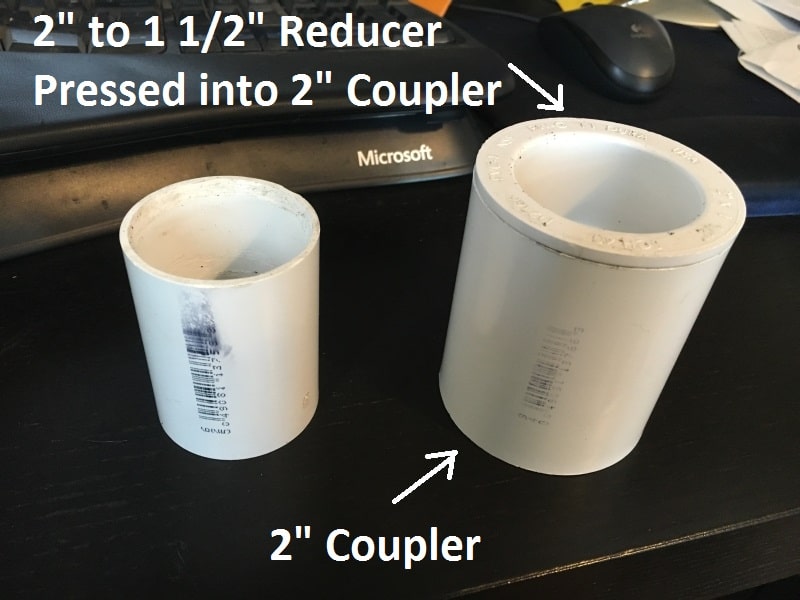
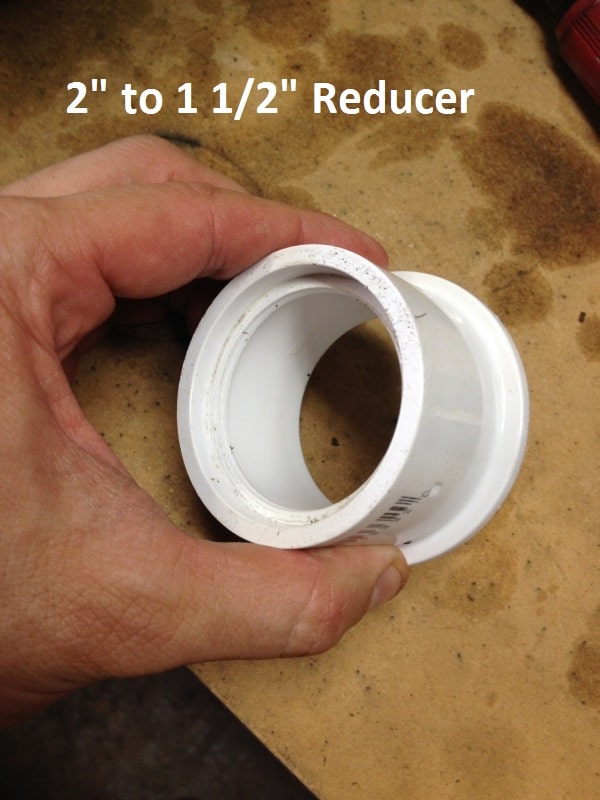
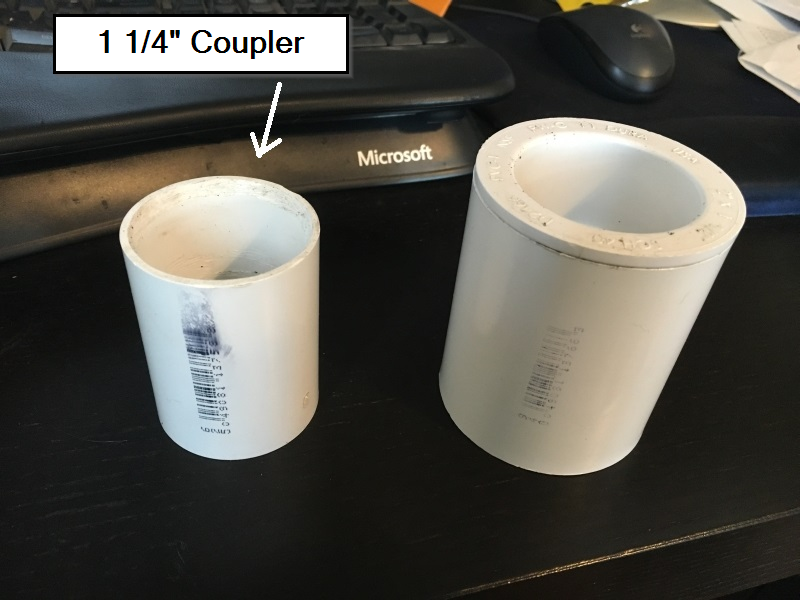
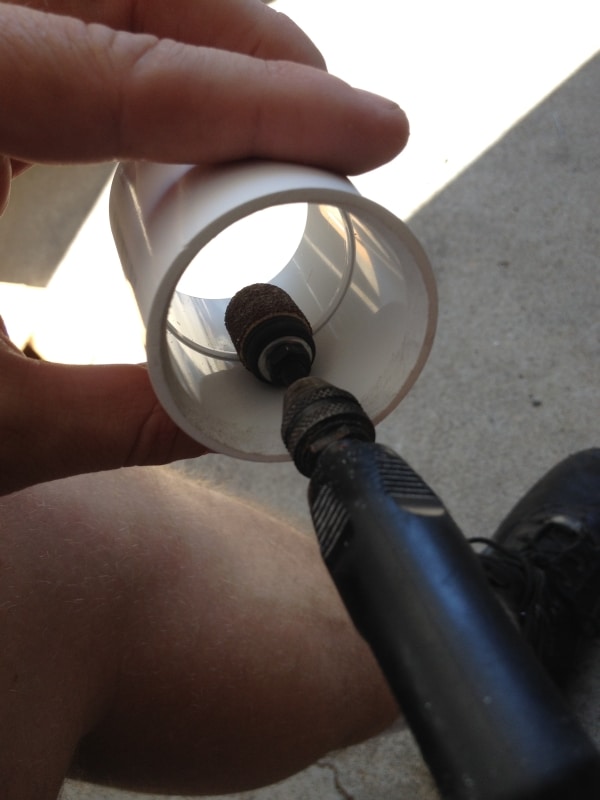
Step 12: At this point, unless your bike is brand new, it’s a good idea to replace the fork seals with new ones rather than reinstall the old ones. Grease the fork oil seal (see below) and slide it back over the upper fork tube leg, and slide the upper fork tube leg with seal back into the lower fork leg and seat the seal into the top of the lower fork leg. You will need a fork seal driver to drive the seal flush into the lower fork leg. There are tons of different versions of home made fork seal drivers posted around the internet that you will find if you do a google search for home made fork seal driver, most of them are made from PVC pipe. I went to Home Depot and picked up a couple PVC pieces to make my own. I used a 1 1/4″ coupler as my driver and a 2″ to 1 1/2″ reducer as my hammer. I recommend also picking up a 16″ piece of PCV or ABS to make the slide hammer longer, and a 2″ cap for the end. This way you can use a mallet to hammer the seal back on, rather than slide it with your hand. It’s a little easier and less painful. I had to Dremel out the center dividing lip of the 1 1/2″ coupler, and grind a chamfer on the inside edge so it sat correctly on the fork seal.
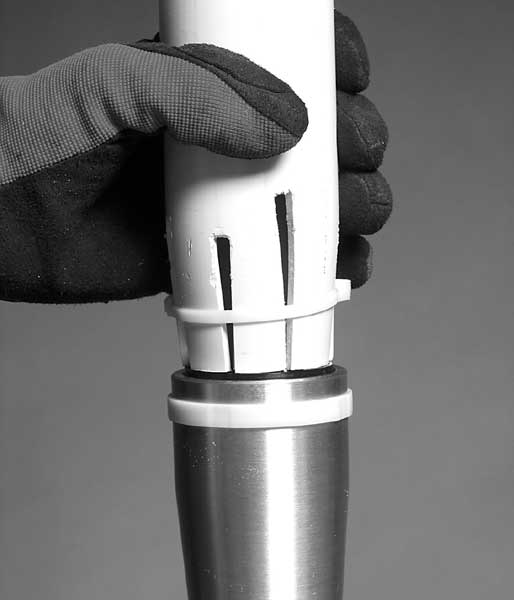
Here’s another option I saw online made from a small section of PVC. For this to work, you will have to use 2″ PVC pipe so when you slot the end, you can compress it with a zip tie or hose clamp to 41 mm (1.61″):
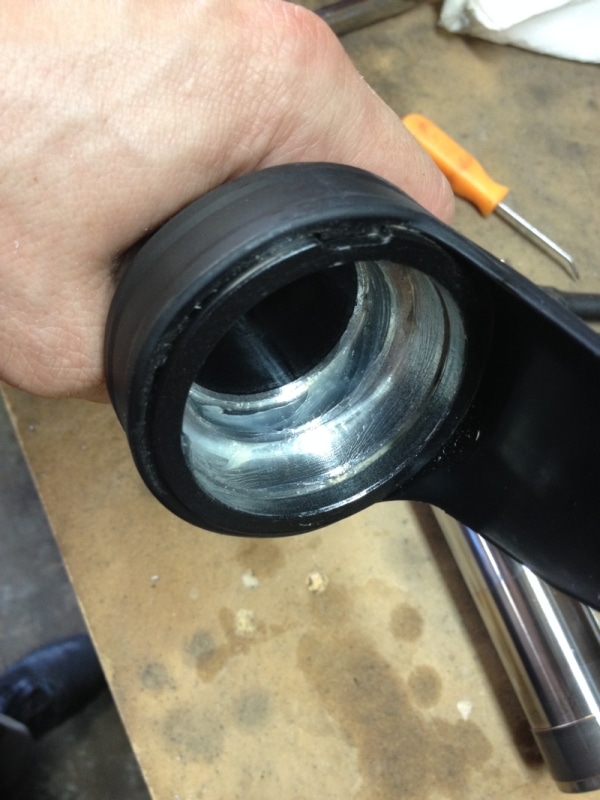
Grease the inside lip of the lower fork leg with heavy fork seal grease like the KYB or Race Tech mentioned above. I had some Slick Honey left over from doing my mountain bike fork seals so I used that.
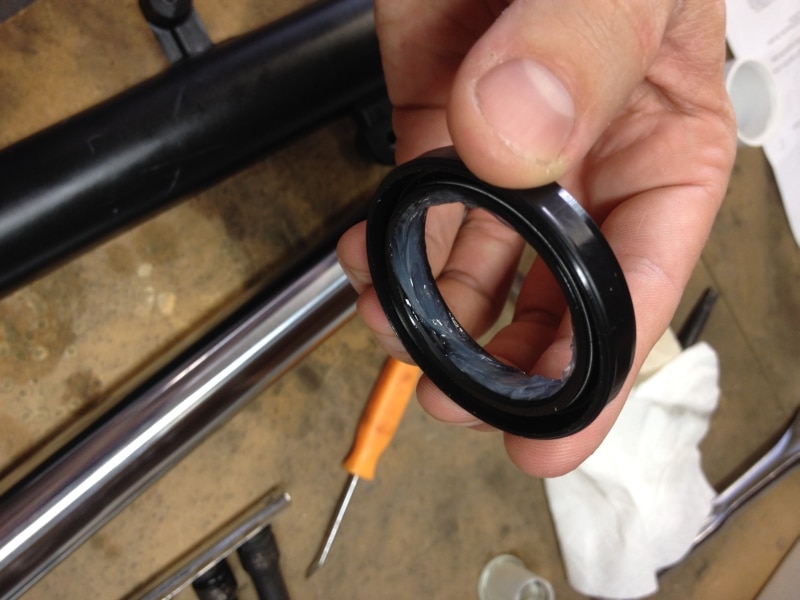
Then also add grease to the inside lip of the fork oil seal:
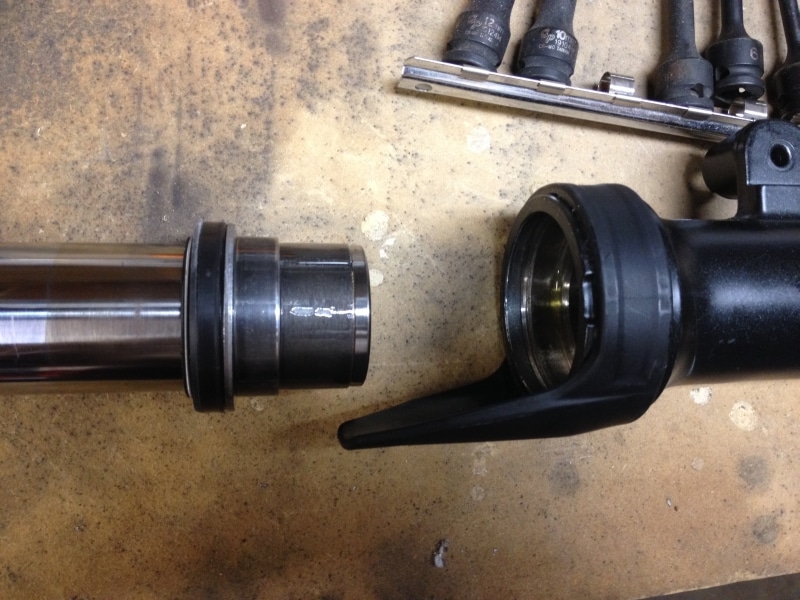
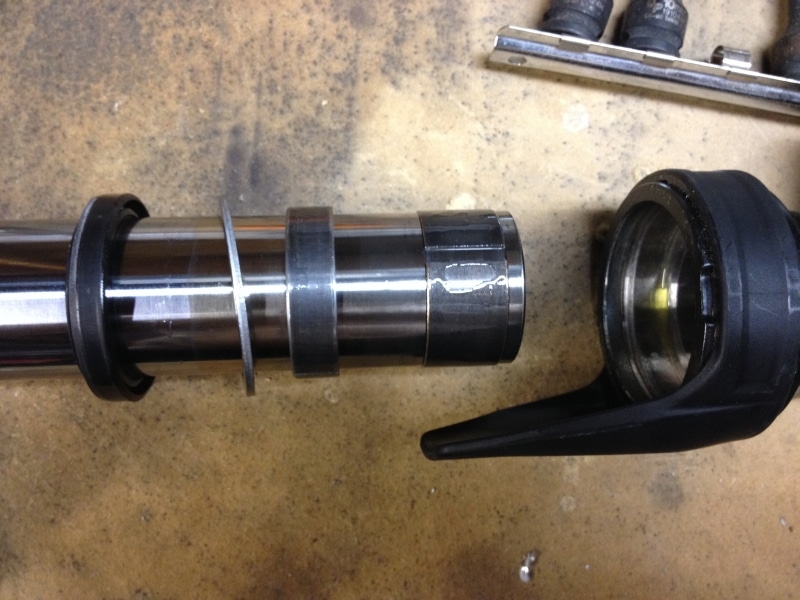
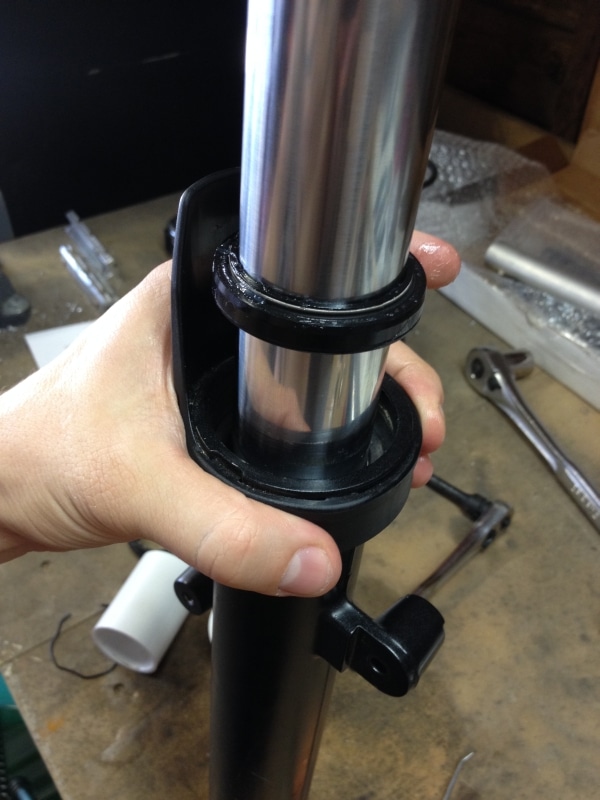
Grease the inside of the lower fork leg where the seal and bushings rest, then reassemble the fork tube with the bushings in the same order as you removed it, and slide the upper fork tube into the lower fork tube (this is the same photo as above, yours should be cleaned and greased):
First the bushings:
Then the washer:
Then the fork oil seal:
Then the driver with the chamfered side down against the oil seal and the slide hammer on top:

Use the slide hammer to drive the fork oil seal all the way down until it seats and stops moving. Next, install the retainer clip on top of the fork oil seal. If you can’t get the retainer clip in, the fork seal might not be seated down all the way yet. Use a small flat blade screwdriver to ensure that it seats all the way and clicks into the groove in the fork tube:
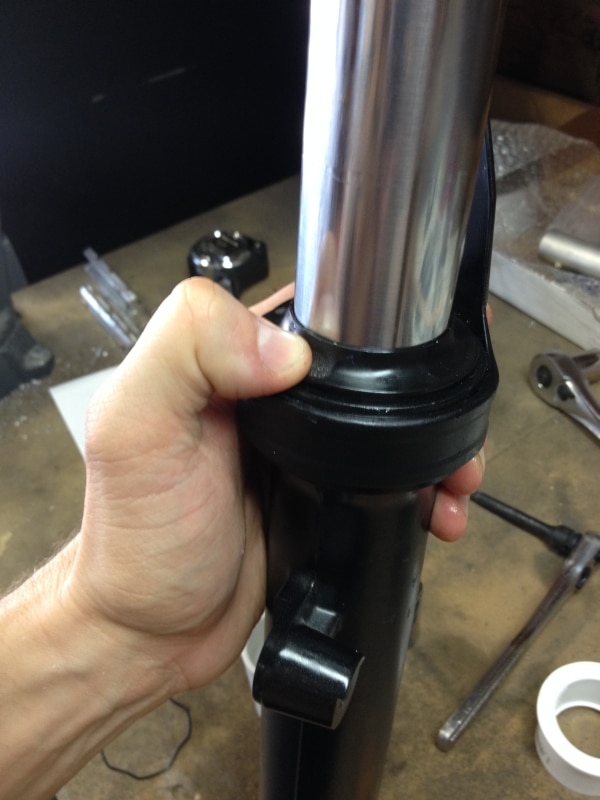
Finally, install the dust seal and press it firmly in place with yours fingers, working your way around until it seats flush with the fork leg:
Slide the fork tube in and out to be sure it operates smoothly.
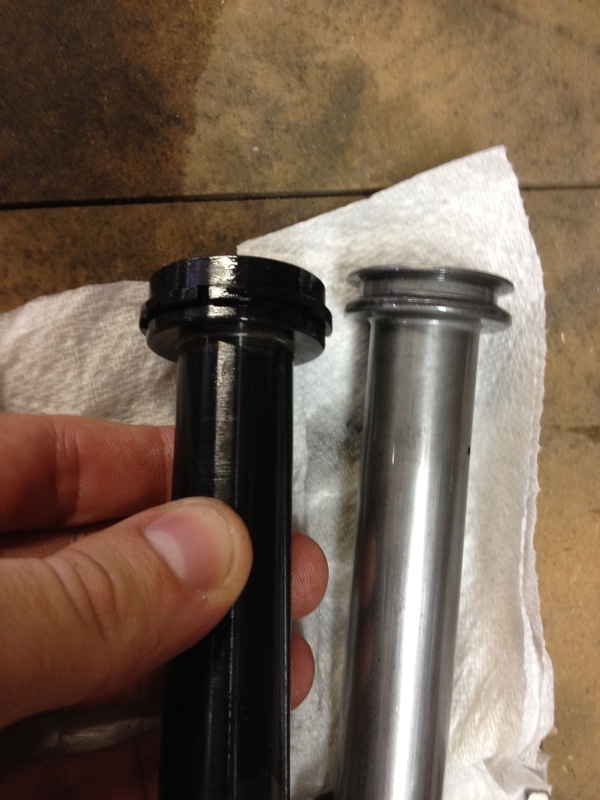
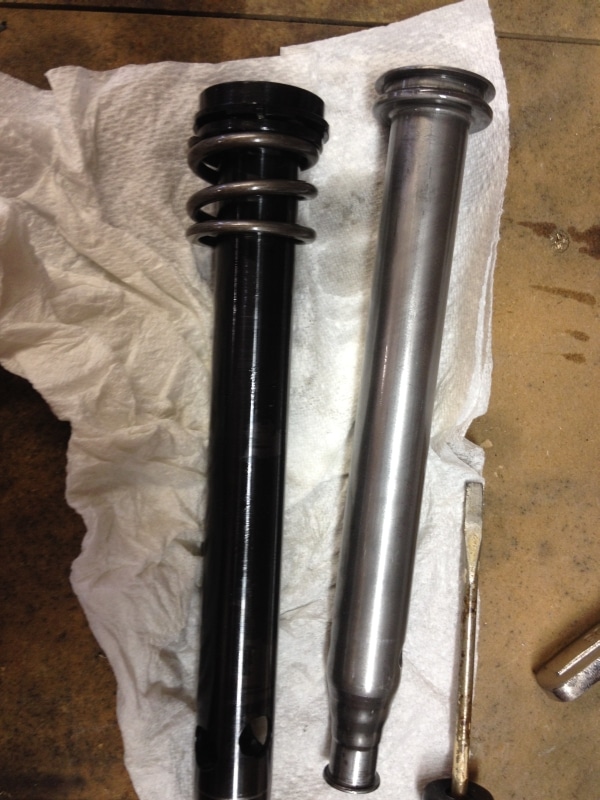
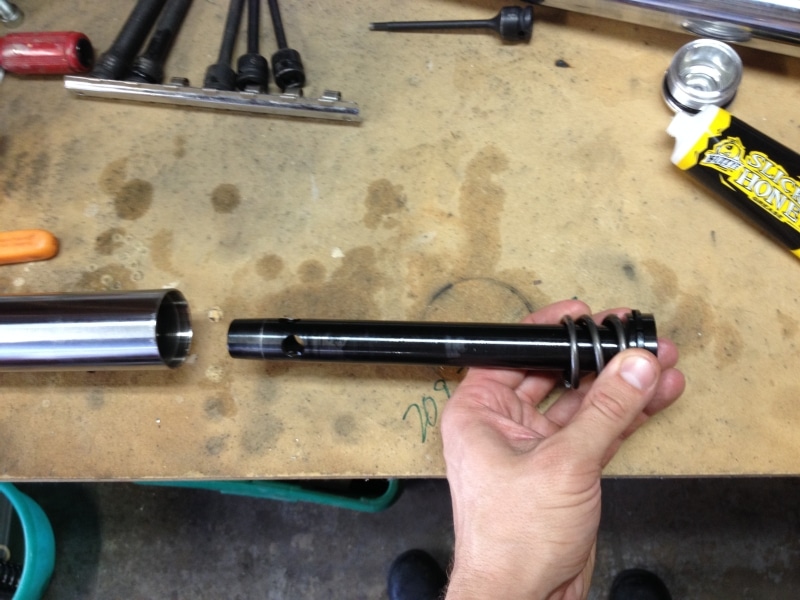
Step 13: GENTLY remove the plastic piston band from the stock damper rod and carefully install it onto the new Traxxion Dynamics damper rod. Remove the top out spring and move it over to the Traxxion Dynamics damper rod as well.
Step 14: Install the new Traxxion Dynamics damper rod with top out spring into the fork leg. Reuse the bottom bolt and crush washer, but clean any locktite off the bolt and washer before reinstalling. Tip the fork leg right side up and start the bolt into the bottom of the fork by hand using the extended 8mm allen socket. Once the bolt is finger tight, clamp the fork leg back in the vise by the flat at the end and tighten the bolt. Tighten this bolt by hand with a ratchet until it does not want to spin. If the bolt just spins and won’t tighten by hand, you may have to use an electric or pneumatic impact gun to tighten it completely. Only bump it once with the impact gun, then recheck with a ratchet by hand to see if it is tight and won’t spin. Traxxion says it is rare that you will have to use an impact gun to get this bolt to tighten completely, but I needed one. Just be very careful not to strip this bolt, it has fine pitch threads and the fork leg is aluminum so it can be damaged easily.
Step 15: Presetting your cartridge emulators:
If you purchase your damper rod kit from YamahaR3Racing.com, your emulators will come preset for your R3 based on the information you gave about your weight and riding style (race or street) and you can disregard this step and go onto step 16.
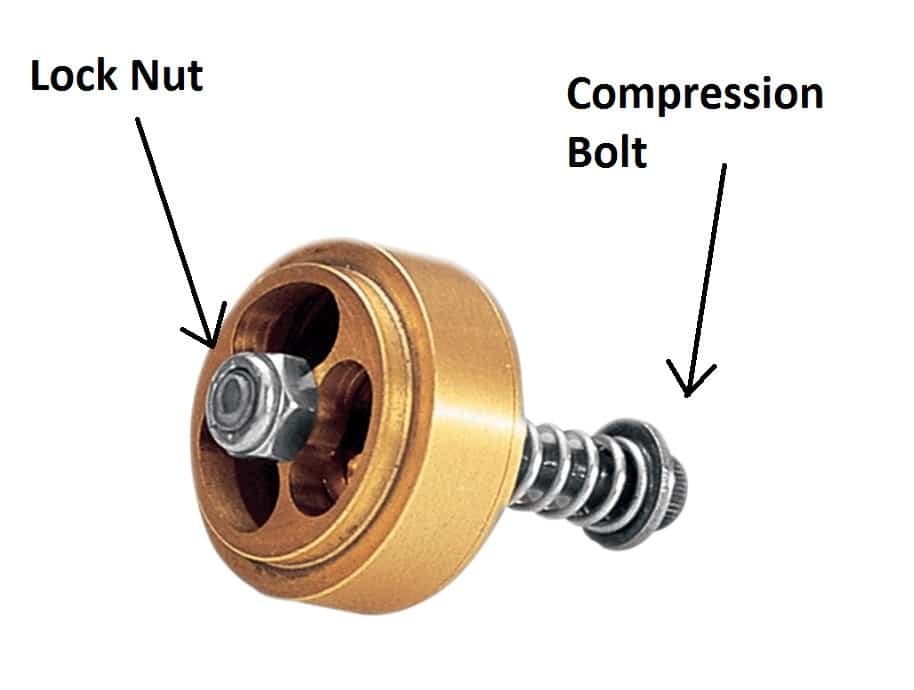
If your emulators are not preset, then set the preload on the emulator compression spring to ‘3 turns’ for street use, or ‘3 1/2 turns’ for race use. Hold the lock nut with a wrench and back out the compression bolt until the spring is loose on the emulator, then turn it back in just until the spring has no free play. This is ‘zero preload’. Then turn the bolt in 3 full turns for street use, or 3 1/2 full turns for race use.
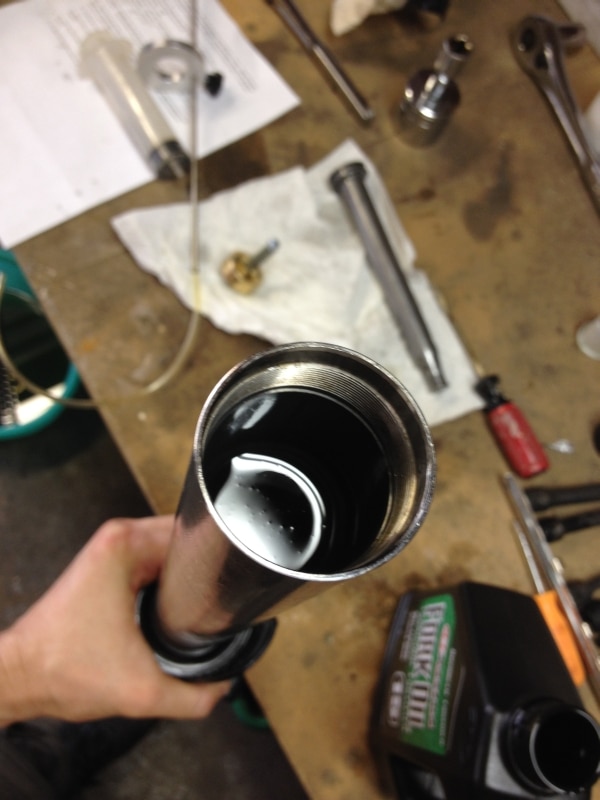
Step 16: Compress the fork leg completely, and fill the fork tube until it is about 3″ from the top with oil, then pump the fork leg up and down to bleed out all of the air. Traxxion Dynamics recommends Maxima 15wt fork oil. Since oil viscosity can vary from brand to brand, I would stick with Maxima 15wt as a starting point. Because the damper rod kit with cartridge emulators relies on the oil thickness to create rebound damping, there is about a 20 degree temperature range where you get optimum rebound damping. If you are riding in 65-85 degree fahrenheit weather, 15 weight oil seems to be spot on for a person in the 150-170 lb range. If it’s hotter, or you are heavier (stiffer springs), you may want to experiment mixing in a small amount of 20wt oil to slow the rebound a tad. If you are lighter or racing in generally colder weather, you can experiment mixing in a little 5 or 10 weight to speed up the forks a little. But don’t veer too far from 15wt or it will be too loose or too stiff. We’ve tried pure 20wt with a 150 lb and 170 lb rider and it was way too stiff.
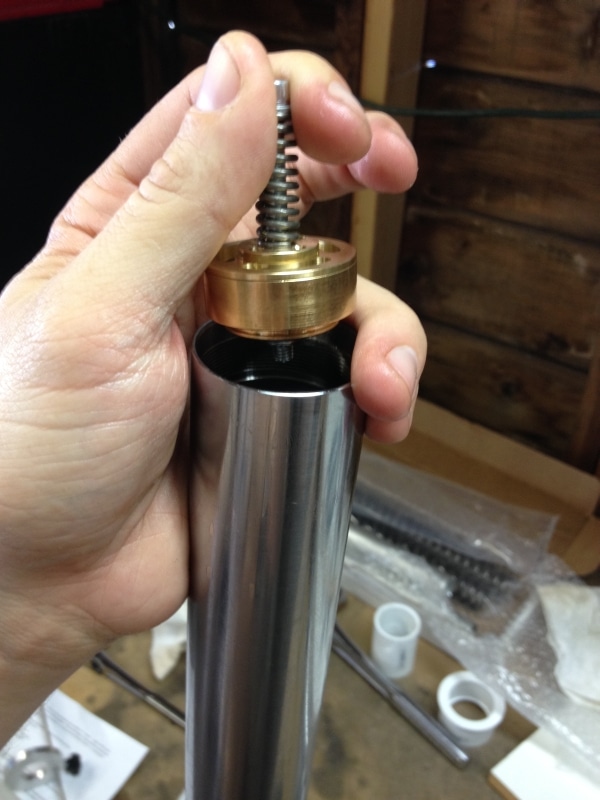
Drop the emulators into the oil with the screw and spring pointed up:
Set the fork leg on a bench or the floor, compress the leg all the way, and set the oil height level to 110 mm while the fork is compressed:
Step 17: Extend the fork all the way and clamp it back in the vise. Drop in the new springs, then washers, then preload spacers (it does not matter which way you install the preload spacer).
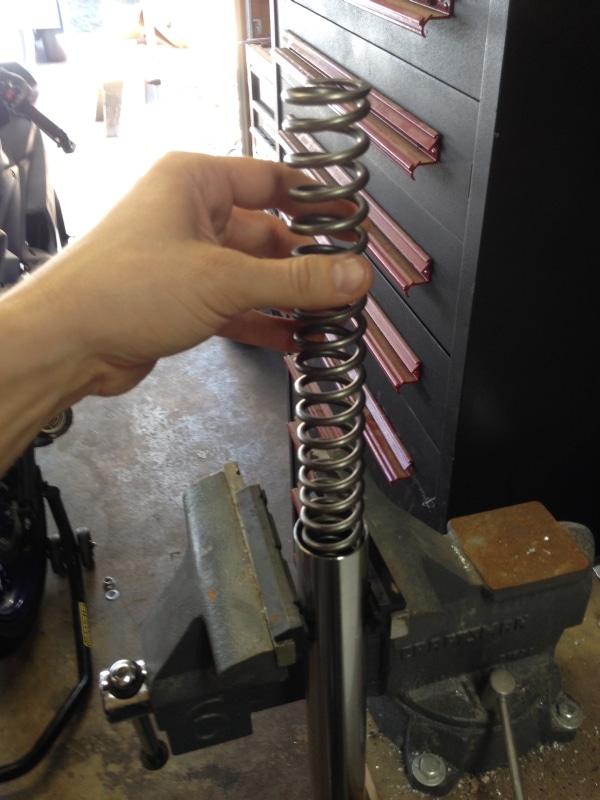
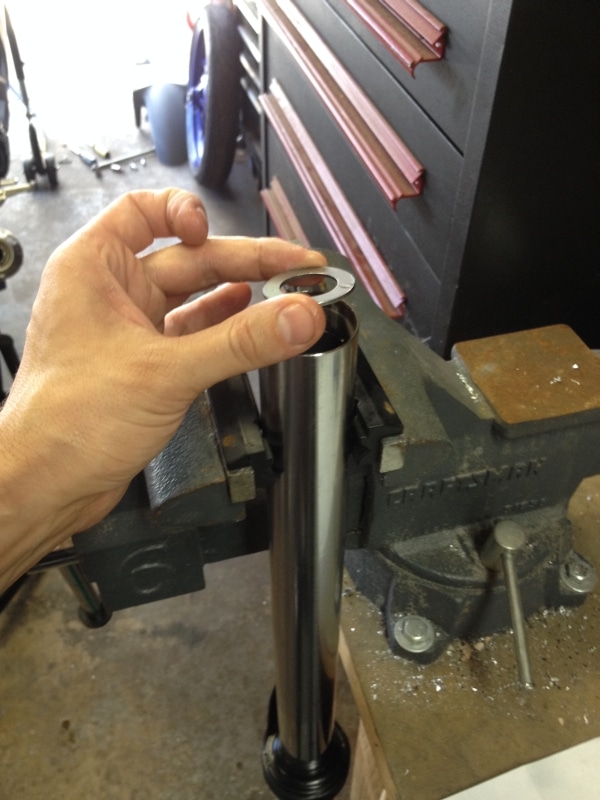
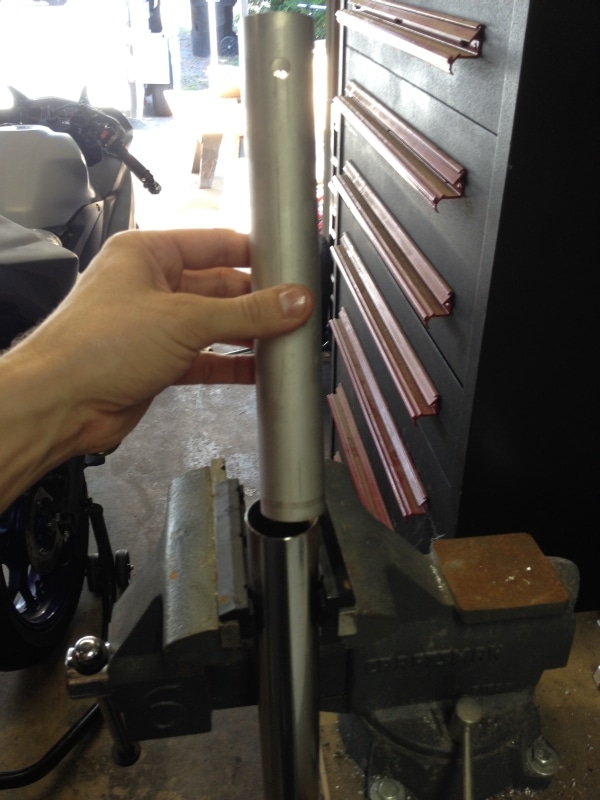
Be sure the spring is seated properly on top of the emulator. It helps to spin the fork leg quickly a few times to get the emulator to seat properly in the spring. If the preload spacer is sitting above the top of the fork tube, it is not seated properly and you may have to pull the spacer and spring back out and drop the spring in again to get it to seat properly on top of the emulator. The preload spacer should sit just below the top of the fork tube (the same way the stock spacer sat) if the spring is seated properly on the top of the emulator:
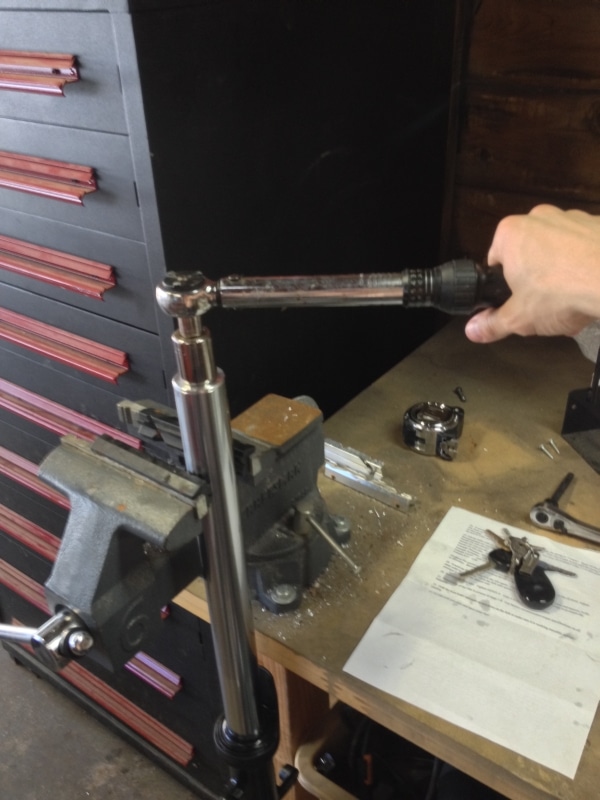
Step 18: Once everything is installed properly in the fork leg, press the fork cap down while you screw it in by hand or with a socket until the threads catch. You only have to compress the spring slightly to install the cap. Torque the cap to 6 ft-lbs.
Repeat this process with the other fork leg.
Wipe both forks clean with a cleaner or solvent like alcohol or acetone to remove all oil from the outside before reinstalling the fork legs back on the bike.
Reinstall the fork legs in the reverse of the process above, and you’re all done!
About Norton Racing
1 Comment to “ How to install the Traxxion Dynamics Fork Damper Rod kit with Cartridge Emulators in the Yamaha R3 2015-2018”
You must be logged in to post a comment.














I am an experienced mechanic and must say that is an excellent, step-by-step write-up. Along with the photos, these instructions make this procedure as straight forward as possible.